1. Overview
At work, some software is not compatible with macOS, and installing a Windows virtual machine solves this problem. Here we use UTM, virtualization software distributed under the Apache-2.0 license. Compared with Parallels Desktop, it doesn't need to be purchased, so it costs less, and it doesn't need to be cracked, so there are no compliance issues. Because the M1 chip has a different hardware architecture, you can't use an x86_64 system image when installing the Windows virtual machine; use a Windows 11 ARM image instead.
2. Steps
- Download links for the required software and images:
Download UTM Download the Windows 11 ARM image (you need to sign in with an account enrolled in the Windows Insider Preview) Download drivers Download Microsoft Remote Desktop (requires an Apple ID from a region other than mainland China)
- When the download finishes, open the UTM installer and drag it into the Applications folder. That's all it takes to install UTM.
- Install the Windows virtual machine
- Step 1: Open UTM, then click the "+" button to open the VM creation wizard.
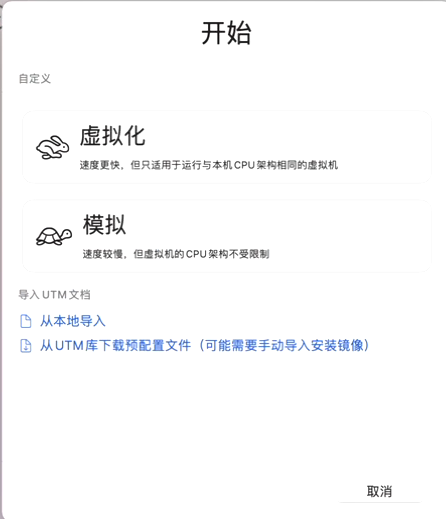
- Step 2: Click "Virtualize"
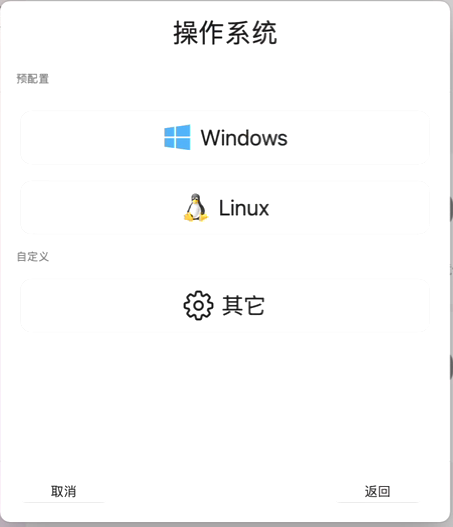
- Step 3: Select "Windows"
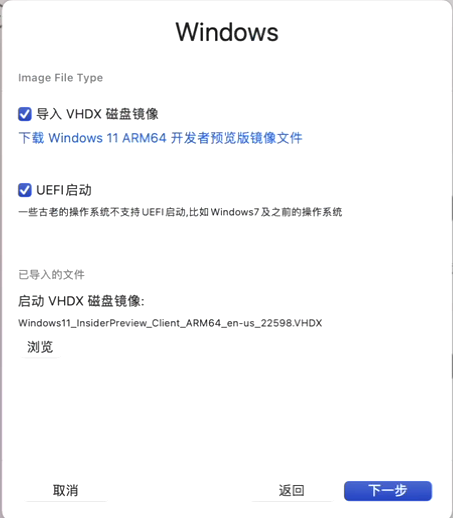
- Step 4: Check "Import VHDX Image", select the Windows 11 ARM image you downloaded at the start of this guide, and click Next.
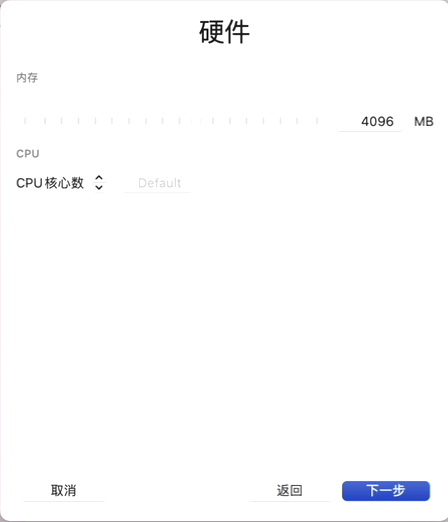
- Step 5: Choose the amount of RAM and the number of CPU cores the VM can use. The defaults are fine here; click "Next" to continue.
- Step 6: If you need to mount a directory into the VM, you can select it here. We'll skip this step; click "Next" to continue.
- Step 7: Click "Save" to create the virtual machine.
- Once installation is complete, configure the virtual machine
- Step 1: Click the Run button to start the virtual machine and sign in.
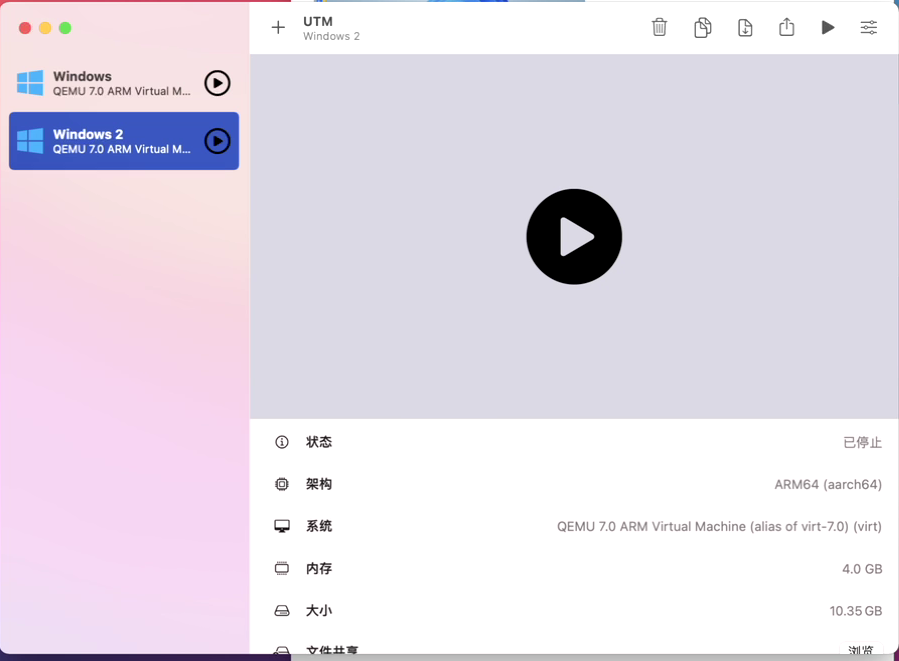
- Step 2: Install the drivers and guest tools: click Drive Image option and select the driver image to mount it.
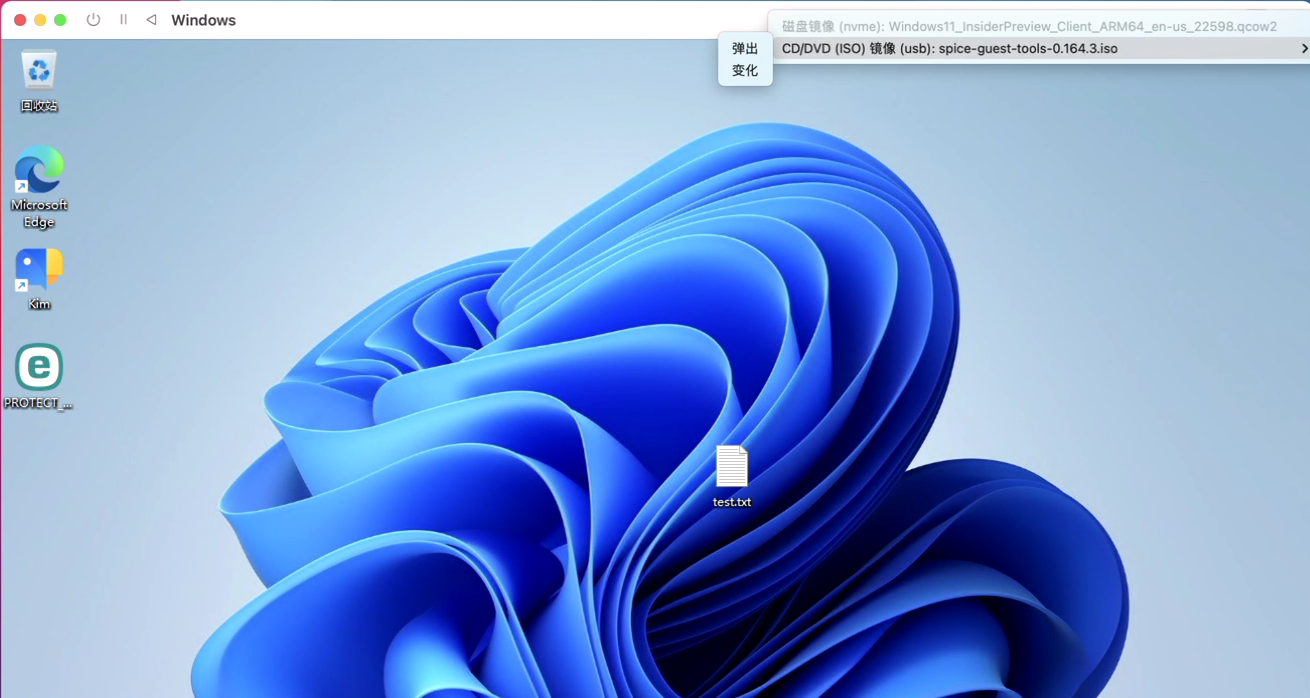
- Step 3: Open File Explorer in the Windows virtual machine, click drive D, and install "spice-guest-tools-xxx.exe".
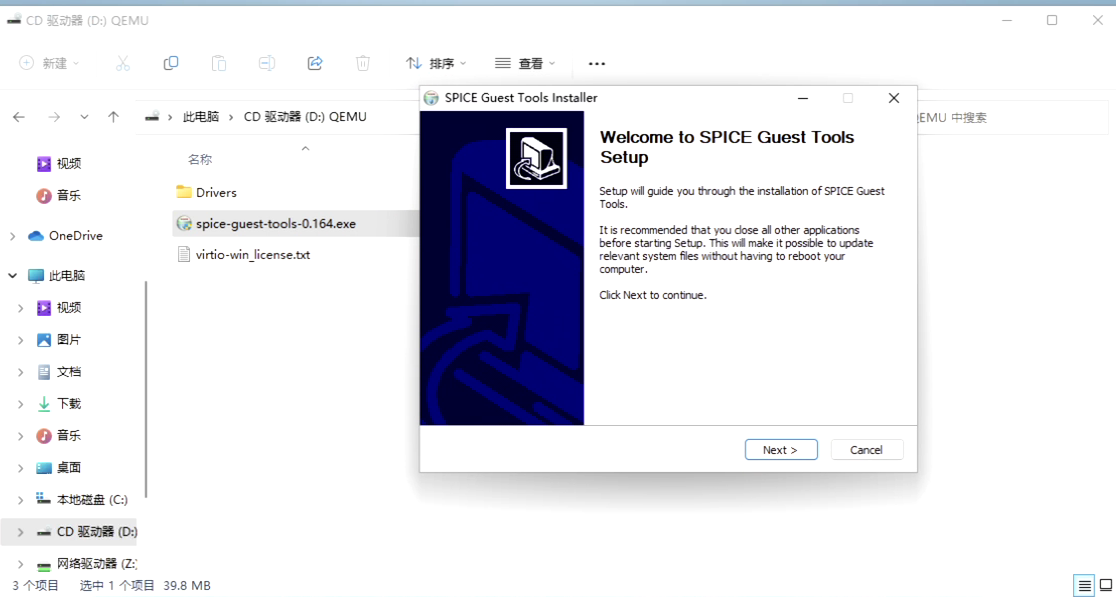
- Step 4: Click "Next - I Agree - Finish" and wait for the virtual machine to restart; after that it's ready to use.
- Step 1: Click the Run button to start the virtual machine and sign in.
- Because the display driver is incomplete, high resolutions aren't supported, and the mouse pointer randomly disappears. We'll work around this with a remote desktop tool.
- Step 1: Shut down the Windows virtual machine, open UTM, and click "Settings" to open the virtual machine settings.
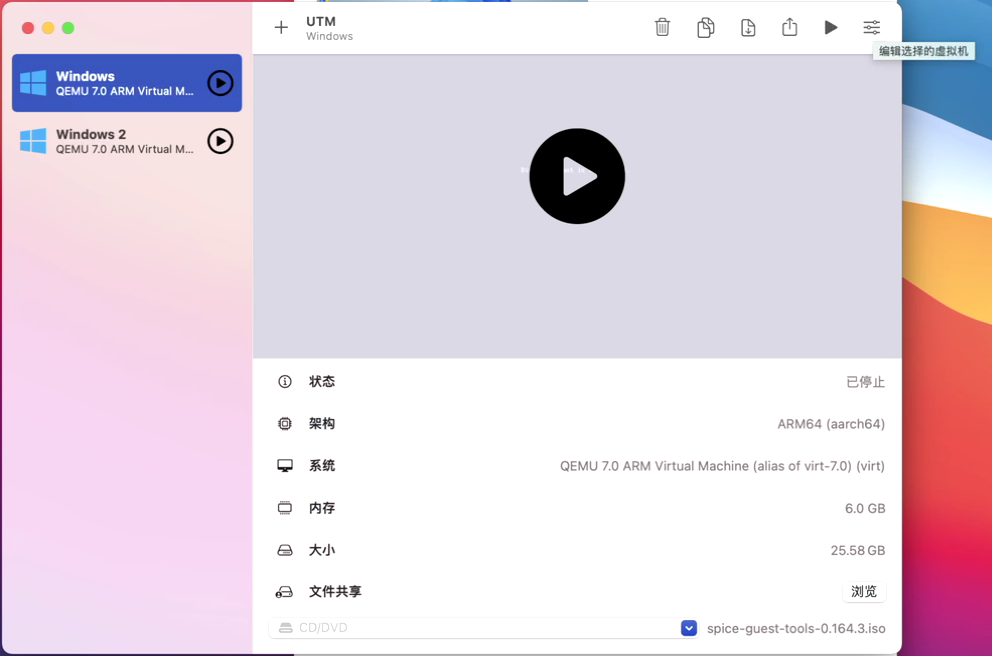
- Step 2: Open the Network tab and create two port forwarding rules, as follows:
TCP protocol:
- Guest address: 10.0.2.15 (set this according to the IP the Windows virtual machine obtained)
- Guest port:3389
- Host address: 127.0.0.1
- Host port: 3389 UDP protocol:
- Guest address: 10.0.2.15 (set this according to the IP the Windows virtual machine obtained)
- Guest port:3389
- Host address: 127.0.0.1
- Host port: 3389
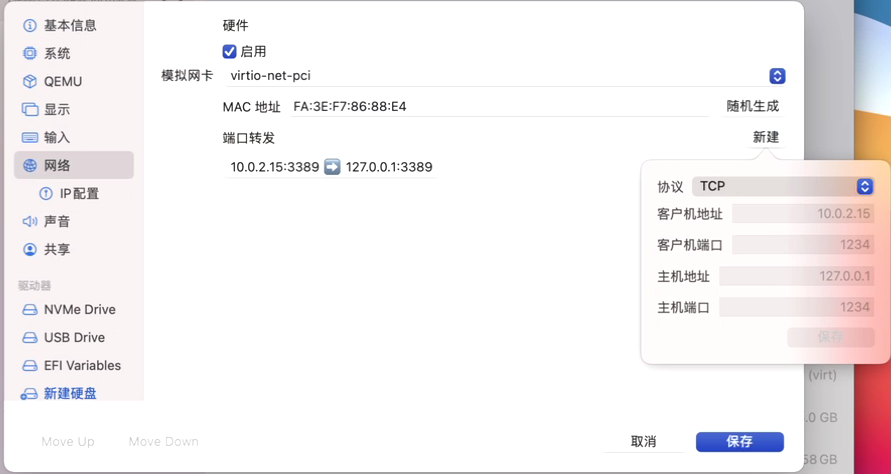
- Step 3: Click "Save", close the virtual machine settings, and start the virtual machine.
- Step 4: Inside the Windows virtual machine, open "Settings - System - Remote Desktop" and turn on the Enable Remote Desktop switch.
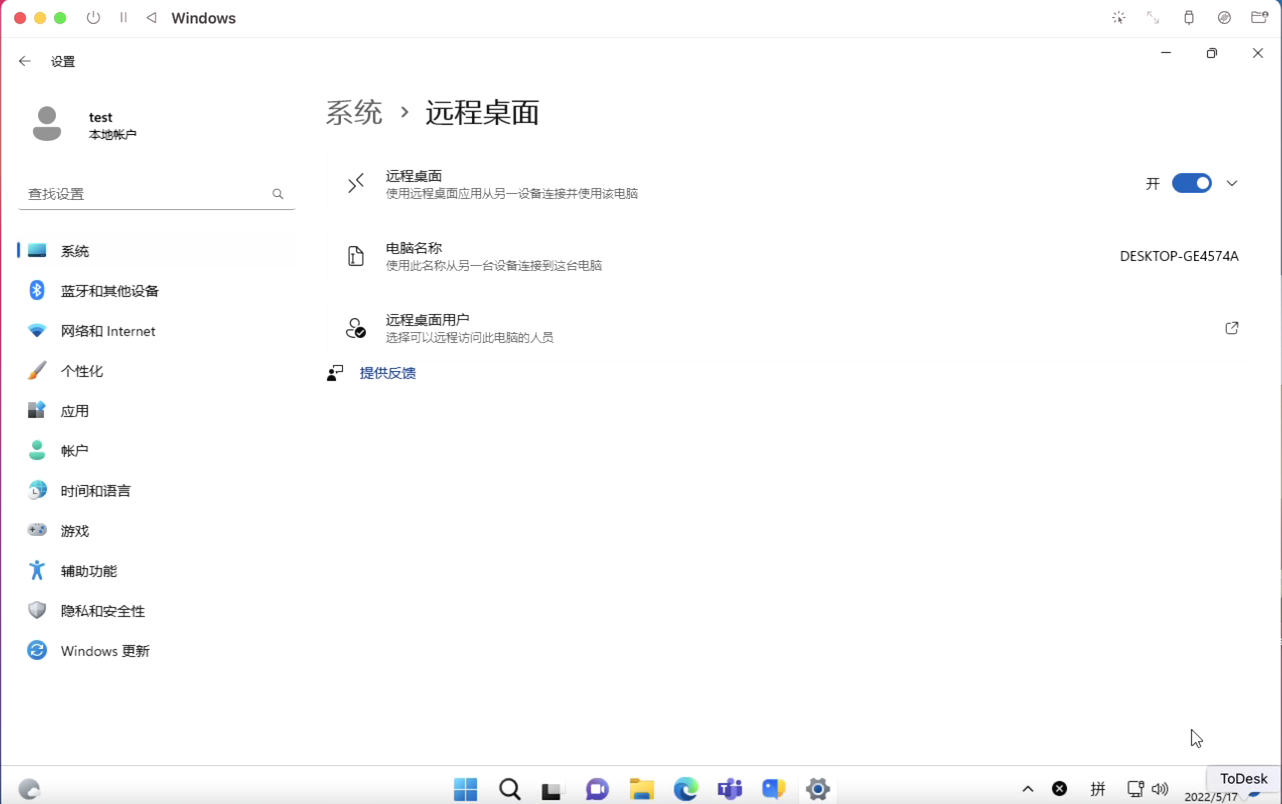
- Step 5: Install Microsoft Remote Desktop on macOS and launch it.
- Step 6: Click Add PC
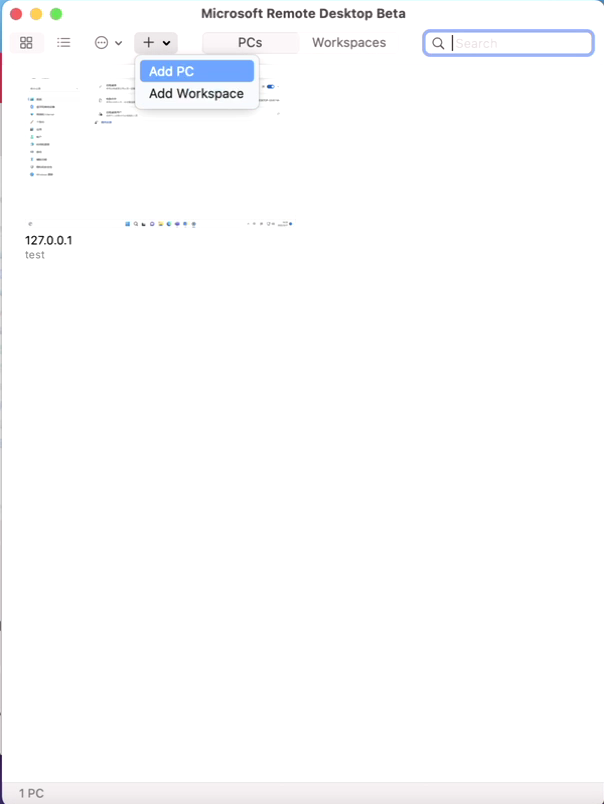
- Step 7: Enter 127.0.0.1 in PC name
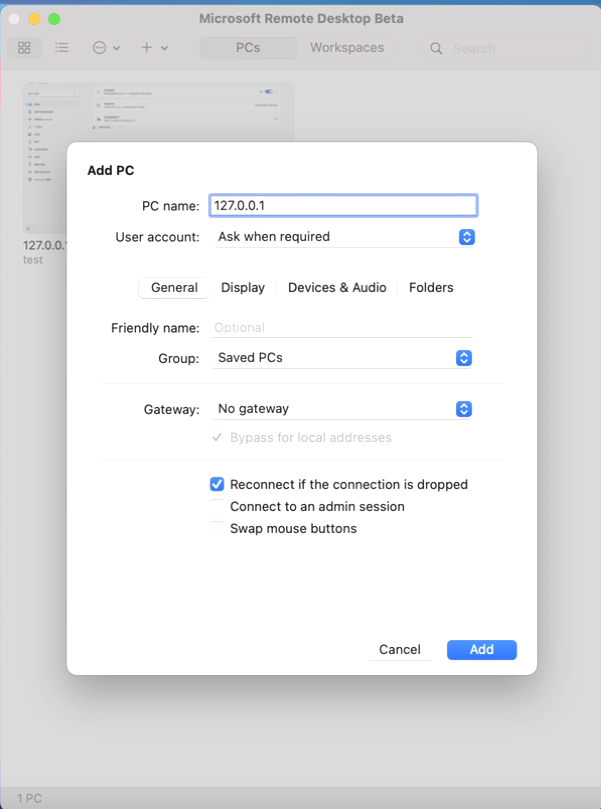
- Step 8: Click User account and select Add User Account...
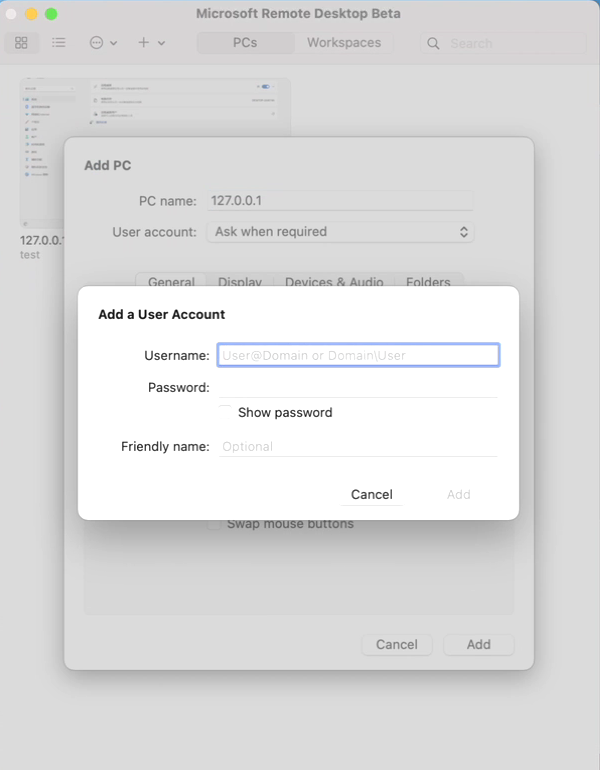
- Step 9: Enter the account name and password you set when configuring the Windows virtual machine, then click Add
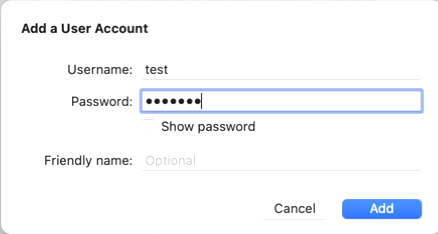
- Step 10: Check that the details are correct, then click Add to finish.
- Step 11: Finally, click to connect.
- Step 1: Shut down the Windows virtual machine, open UTM, and click "Settings" to open the virtual machine settings.
3. FAQ
Question 1: During the initial Windows 11 setup, I can't add an account because there's no network connection.
Answer 1: Press Shift + F10 to open a command prompt, type OOBE\BYPASSNRO and press Enter. The virtual machine will restart automatically, and after it restarts the setup screen will show an "I don't have internet" option. Click it and you can continue with the setup.